
This is a Step by Step Guide with Screenshots to know how to Configure Mailgun Native API in WordPress using SMTPPai Plugin which is a free forever SMTP Plugin for WordPress.
Mailgun is a popular mail provider for transactional email to bulk newsletter sending. In SMTPPai you need three things from Mailgun: the Private API key, the exact Domain name, and the correct Region (US or EU).
How to Setup Mailgun in WordPress
Prerequisites
- A Mailgun account with a sending domain (or sandbox domain for early tests).
- DNS for that domain completed in Mailgun when you move past sandbox use.
- Know whether the domain lives in Mailgun US or EU.
Download & Install SMTPPai
SMTPPai is free forever SMTP Plugin. By using SMTPPai you can connection 15+ Email Providers Native API including Mailgun. SMTPPai offering multi-routing by Specify Connection and that is how you can use separate connections for woocommerce, wordpress transactional email, newsletter, outreach etc. to keep your email sending more safe. SMTPPai having backup/fallback connections, Email log etc. those are actually offering by Pro plugins.
- Download → Install
Open SMTPPai
- SMTPPai → Dashboard → Add connection
- Under More providers, click Mailgun
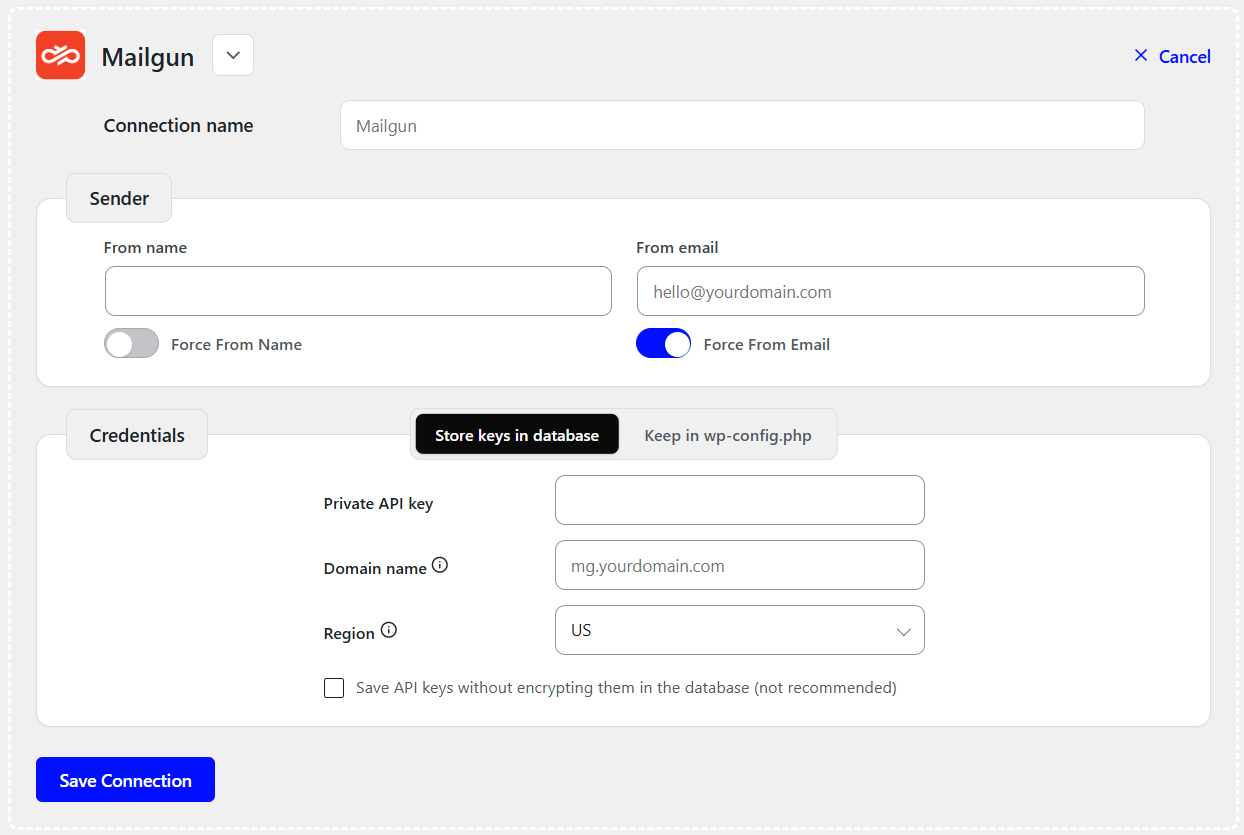
Field-by-field setup Mailgun in WordPress
Connection name
Example: Mailgun
Or anything you want. This is just for yourself and naming the connection. Connection name will not include anywhere in sending emails.
From name
From name is mostly the Business name or Business Department (example: Mailpai). Write down plain text.
From email
First of all add your domain in mailgun account and verify DNS using your hosting provider, Cpanel, Cloudflare etc.
Login to Mailgun → Domains (Under “Send” Menu) → Add Domain
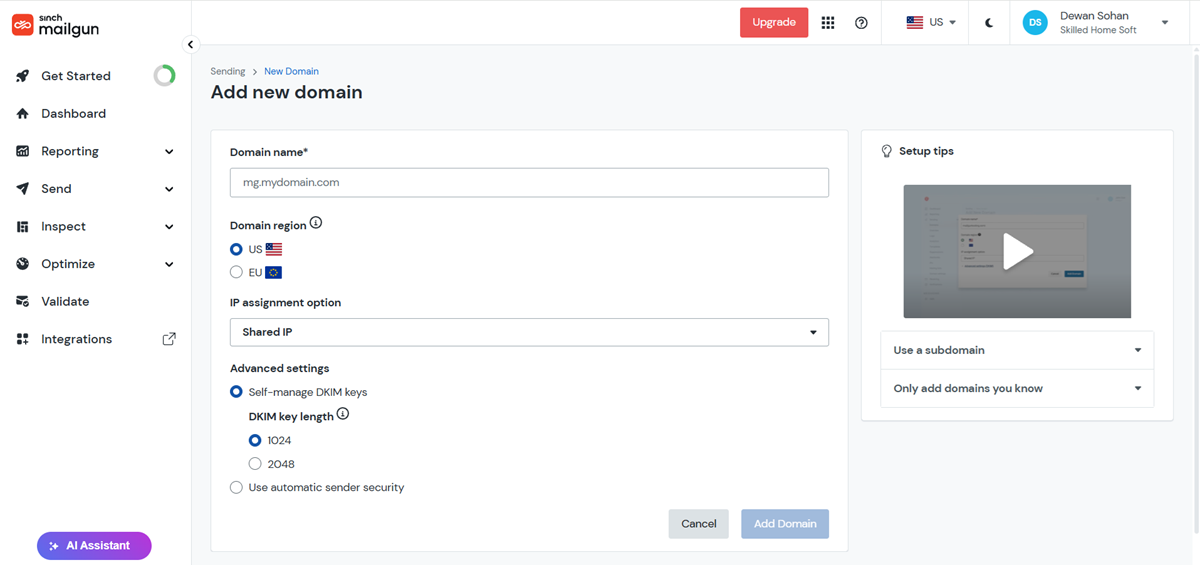
Now add DNS Records including Sending Records, Receiving Records, Tracking Records, Authentication records etc. By doing this process, you can verify your domain. Copy the exact domain (for example yourdomain.com or a sandbox domain). Paste into Domain name. Spelling must match Mailgun exactly.
Now add Email in Mailgun (example: support@mailpai.com).
Mailing List (Under “Send” Menu) → Create Mailing List → Add Mailing List
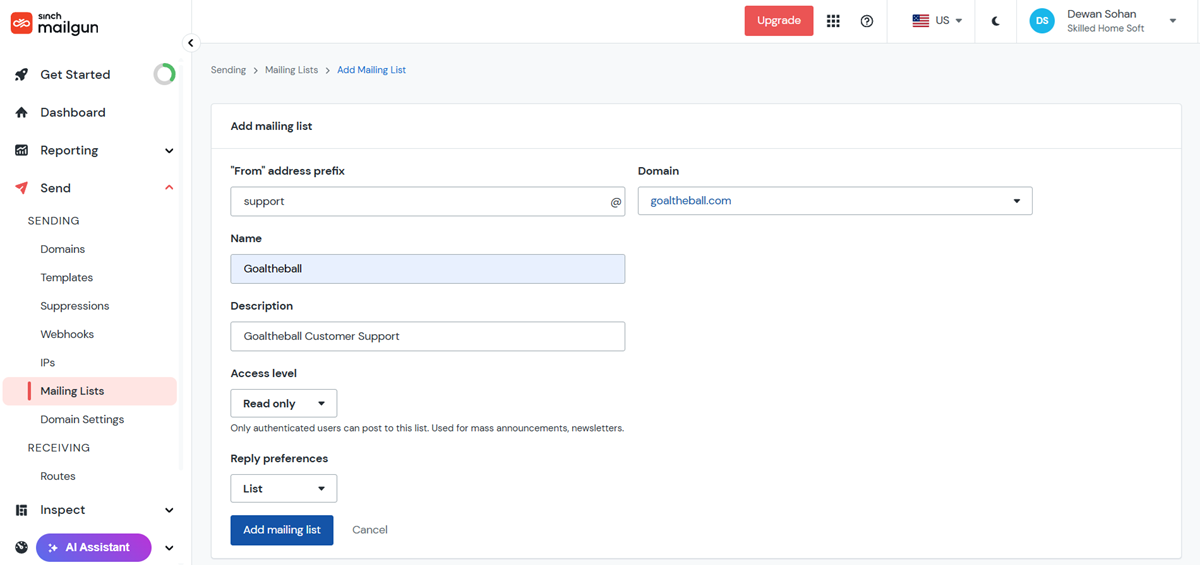
From email should use an address allowed for your Mailgun domain (example: support@mailpai.com).
Private API key
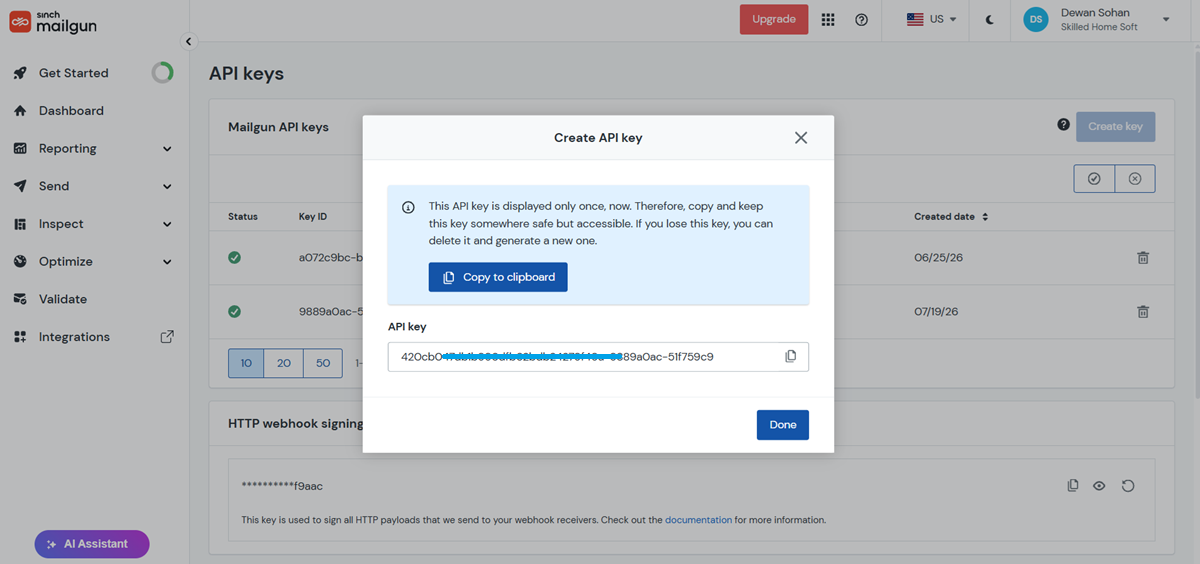
Now create your API key in your mailgun account.
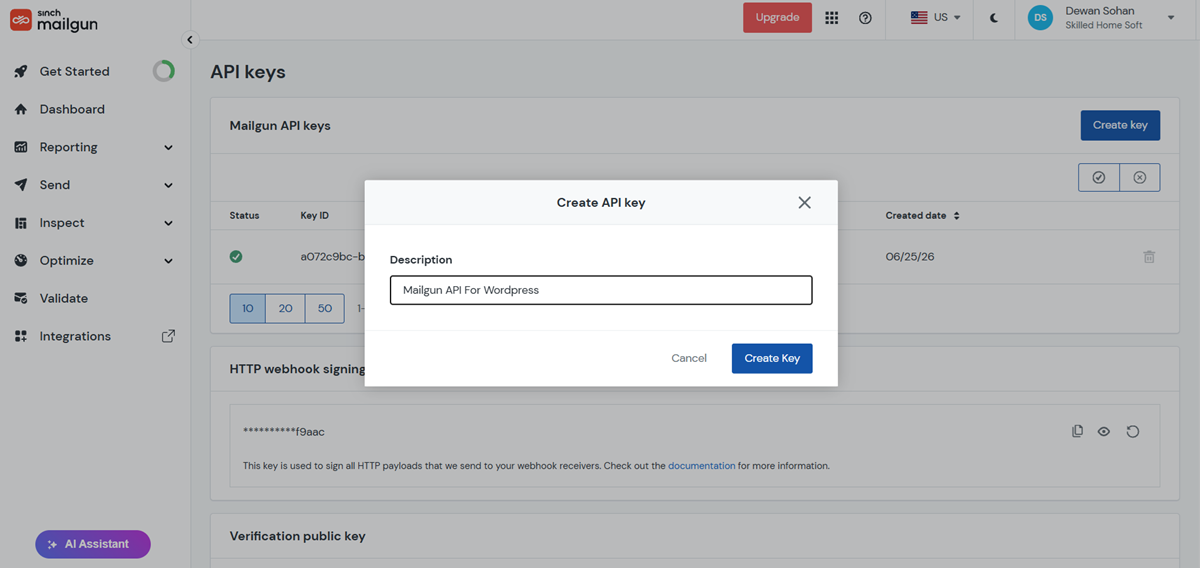
- Open Mailgun → API security → Create Key
- Copy the Private API key.
- Paste it into SMTPPai’s API key field.
Region
Select US or EU to match where the domain was created. EU accounts must use EU or API calls fail.
Credential storage
You can store credential using any method in database or using wp-config file and wp-config is slightly better for security.
- Store Key in Database (encrypted), or
- Keep in wp-config:
define( 'MAILPAI_SMTP_API_KEY', 'your-private-api-key' );plus domain/region still configured on the connection as required by the form.
Save and test
- Save the connection.
- Mailpai Dashboard → Test → enter a recipient → Send test
- Confirmation notification will be displayed and you may also check using Email Log.
Common failures
- Wrong region (US vs EU)
- Domain name mistyped or using From email instead of the Mailgun domain
- From address not authorized on that domain
Related: How connections work · Send a test email